Creating A Custom Wooden Bench With Feast Watson Prooftint & Timber Floor Wax
Creating A Custom Wooden Bench With Feast Watson Prooftint & Timber Floor Wax
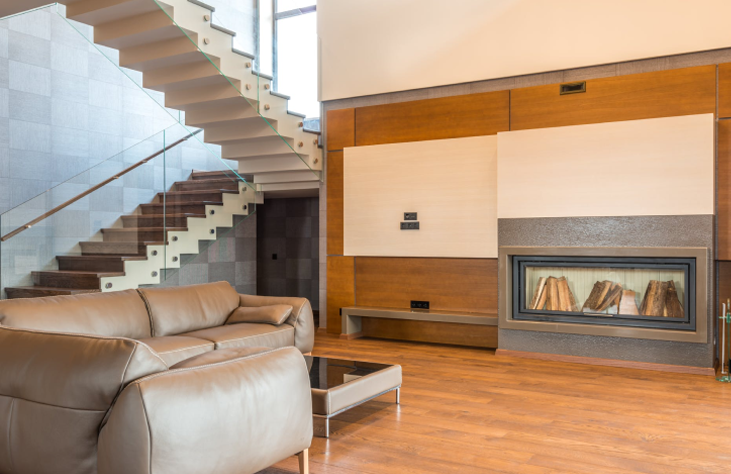
Add a beautiful, yet practical timber piece to your space with our wooden bench DIY. Create a statement colour contrast with our Prooftint colour range or stick to one hue for a monochromatic design.
What you'll need

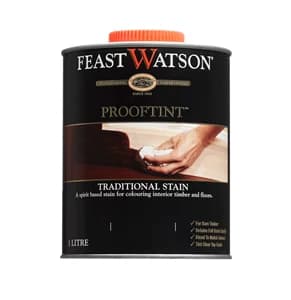
Feast Watson Prooftint™
Colour
Old Baltic
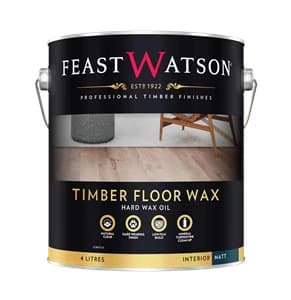
Feast Watson Timber Floor Wax
Size
1L
Qty
1


Paint Brush


Stirrer
Cloth
Electric Sander
Wood Glue
Nails
Before You Start
Work on a clean level surface, free of imperfections or debris. Always use straight boards. Use glue with finish nails for a stronger hold. If gluing before applying stain, wipe excess glue off bare wood for stained projects, as dried glue will not take stain.
Note: Unless you are staining the entire piece one colour, it will be difficult to paint or stain between the slats. You may wish to stain all of your pieces first. We chose to use two different colours of stain between the legs to create an interesting design. I chose Oak and Old Baltic.
Step One: Timber Preparation
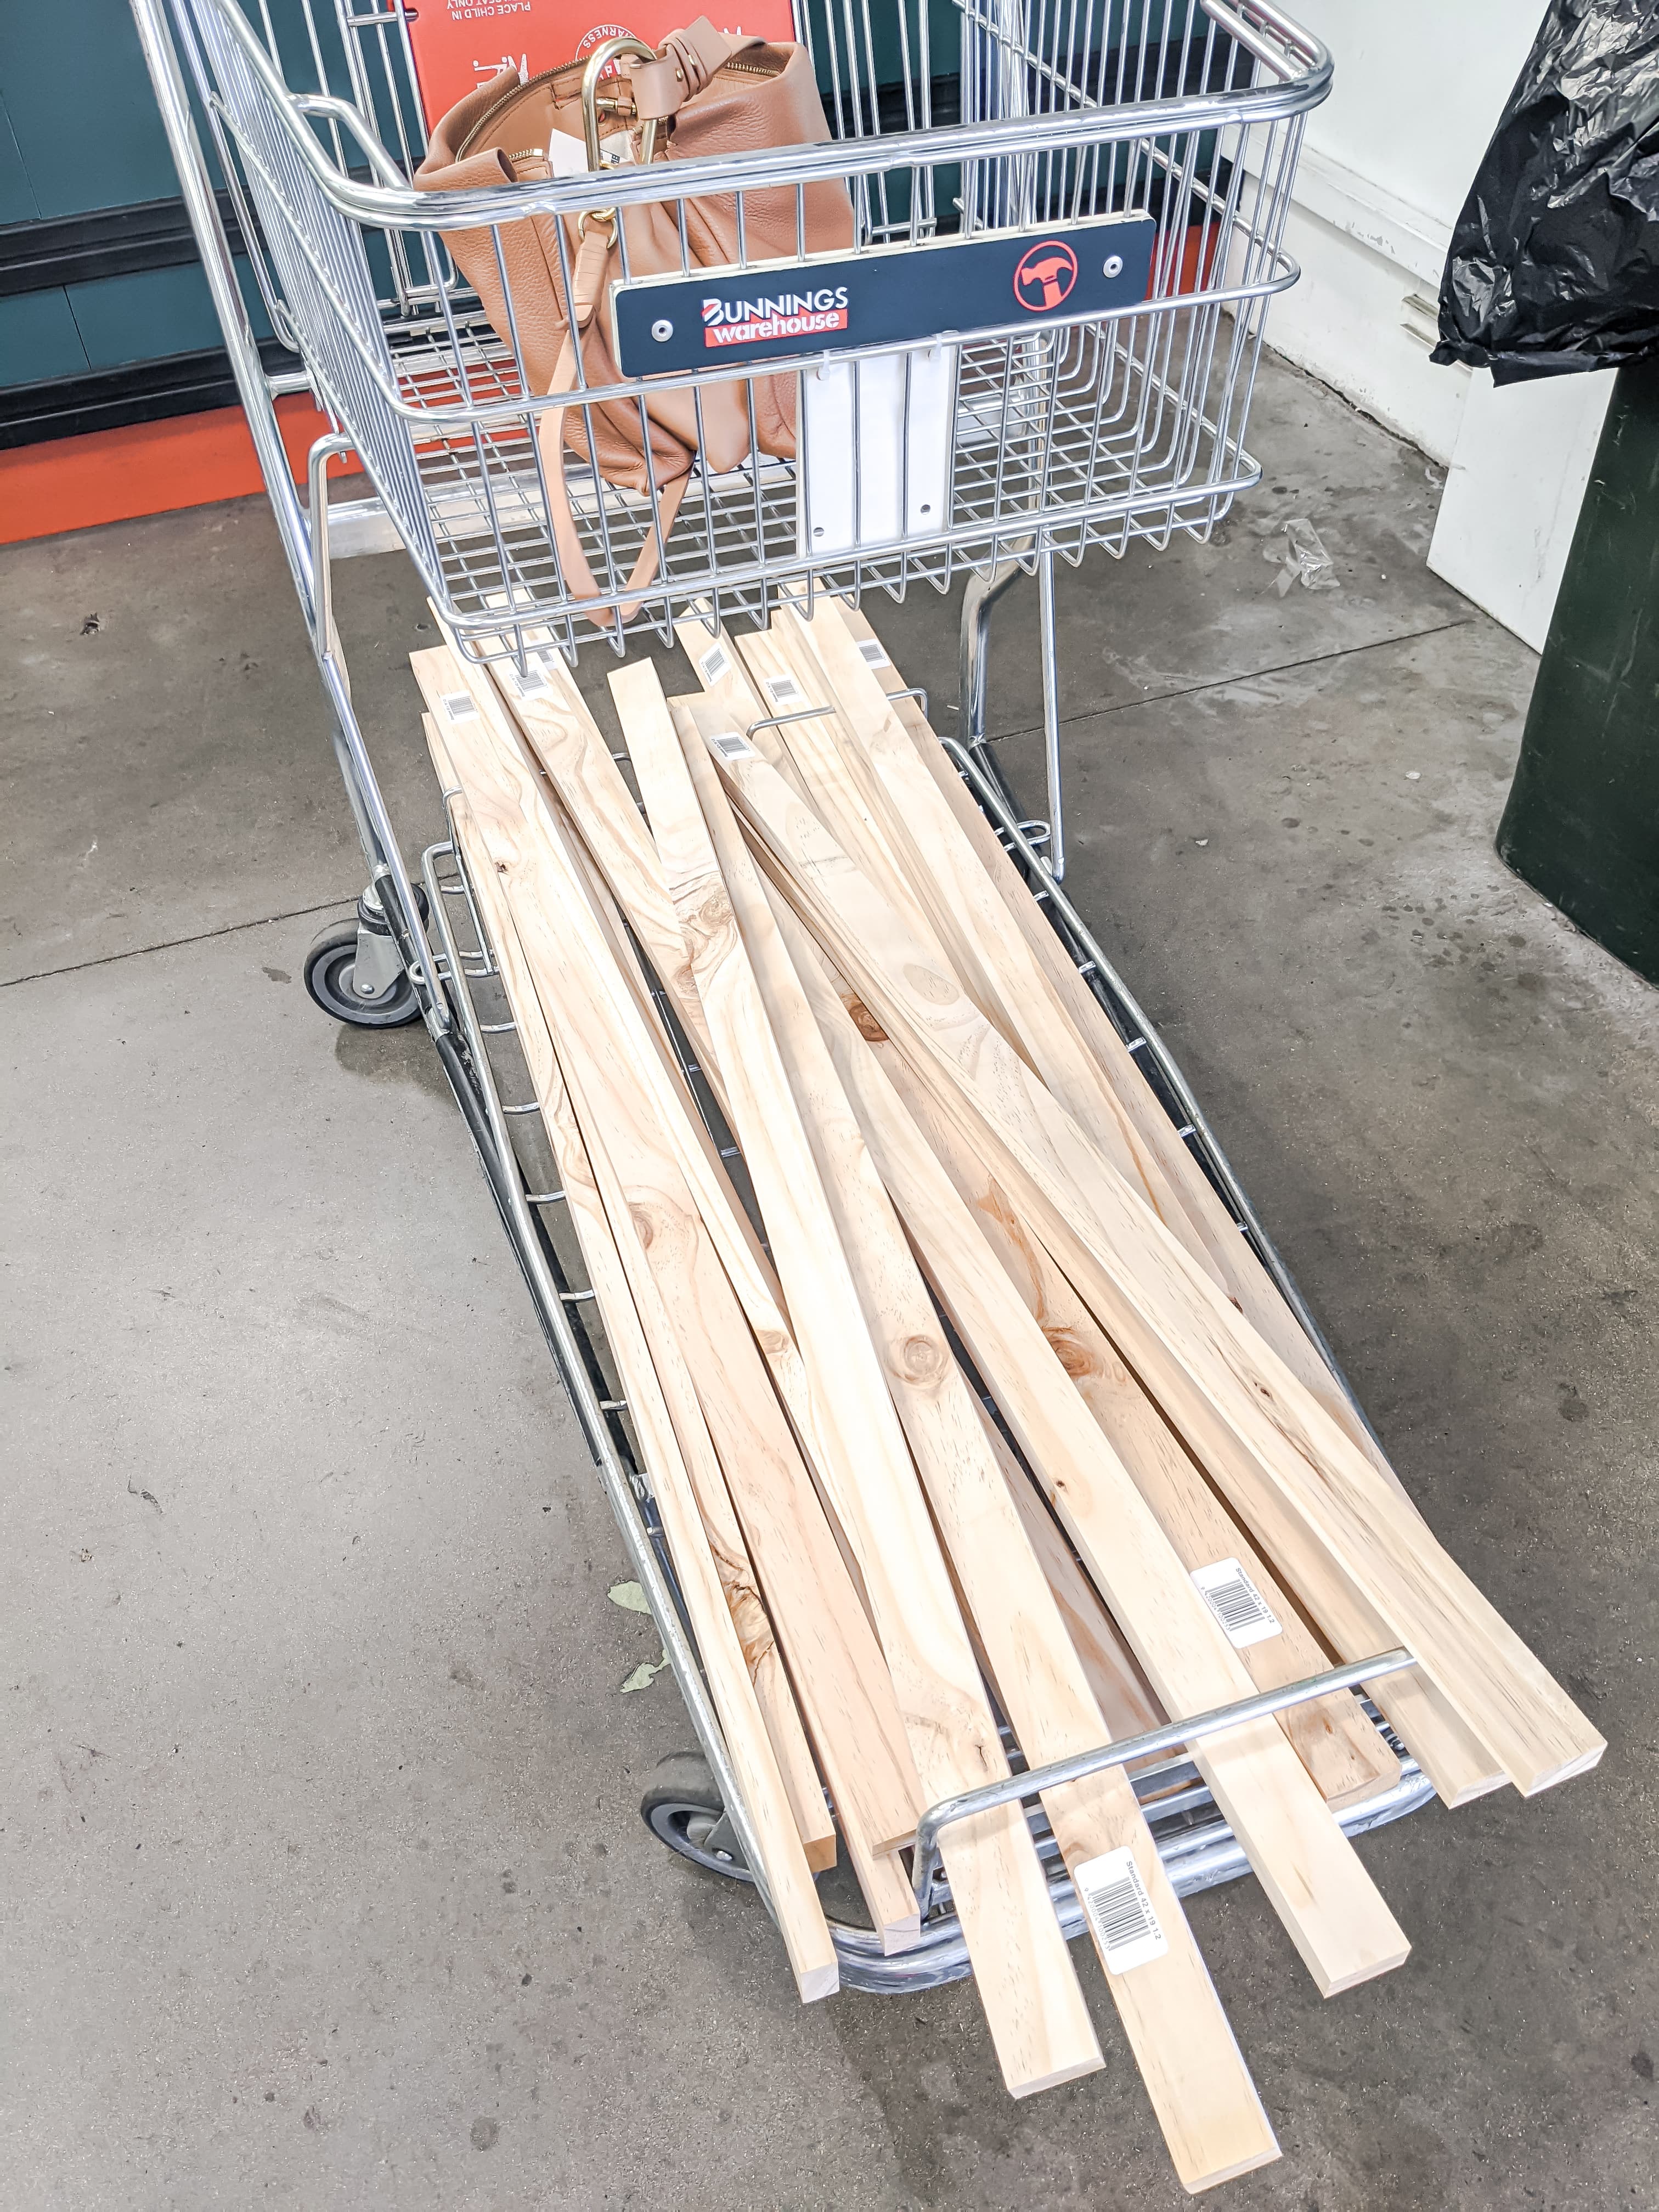
Choose your best looking length of DAR Pine (Dressed All Round Pine) top for seat and leg boards.
We purchased the following timber and lengths: 21 lengths of 42mm x 19mm x 1.2m DAR Pine Standard.
Her is your cut list:
- 9 x seat planks (1.2m length)
- 16 x long leg planks (400mm length)
- 18 x short leg planks (358mm length)
Apply Feast Watson Prooftint on all your planks.
Note: Unless you are staining the entire piece one colour, it will be difficult to paint or stain between the slats. You may wish to stain all of your pieces first. We chose to use two different colours of stain between the legs to create an interesting design. I chose Oak and Old Baltic.
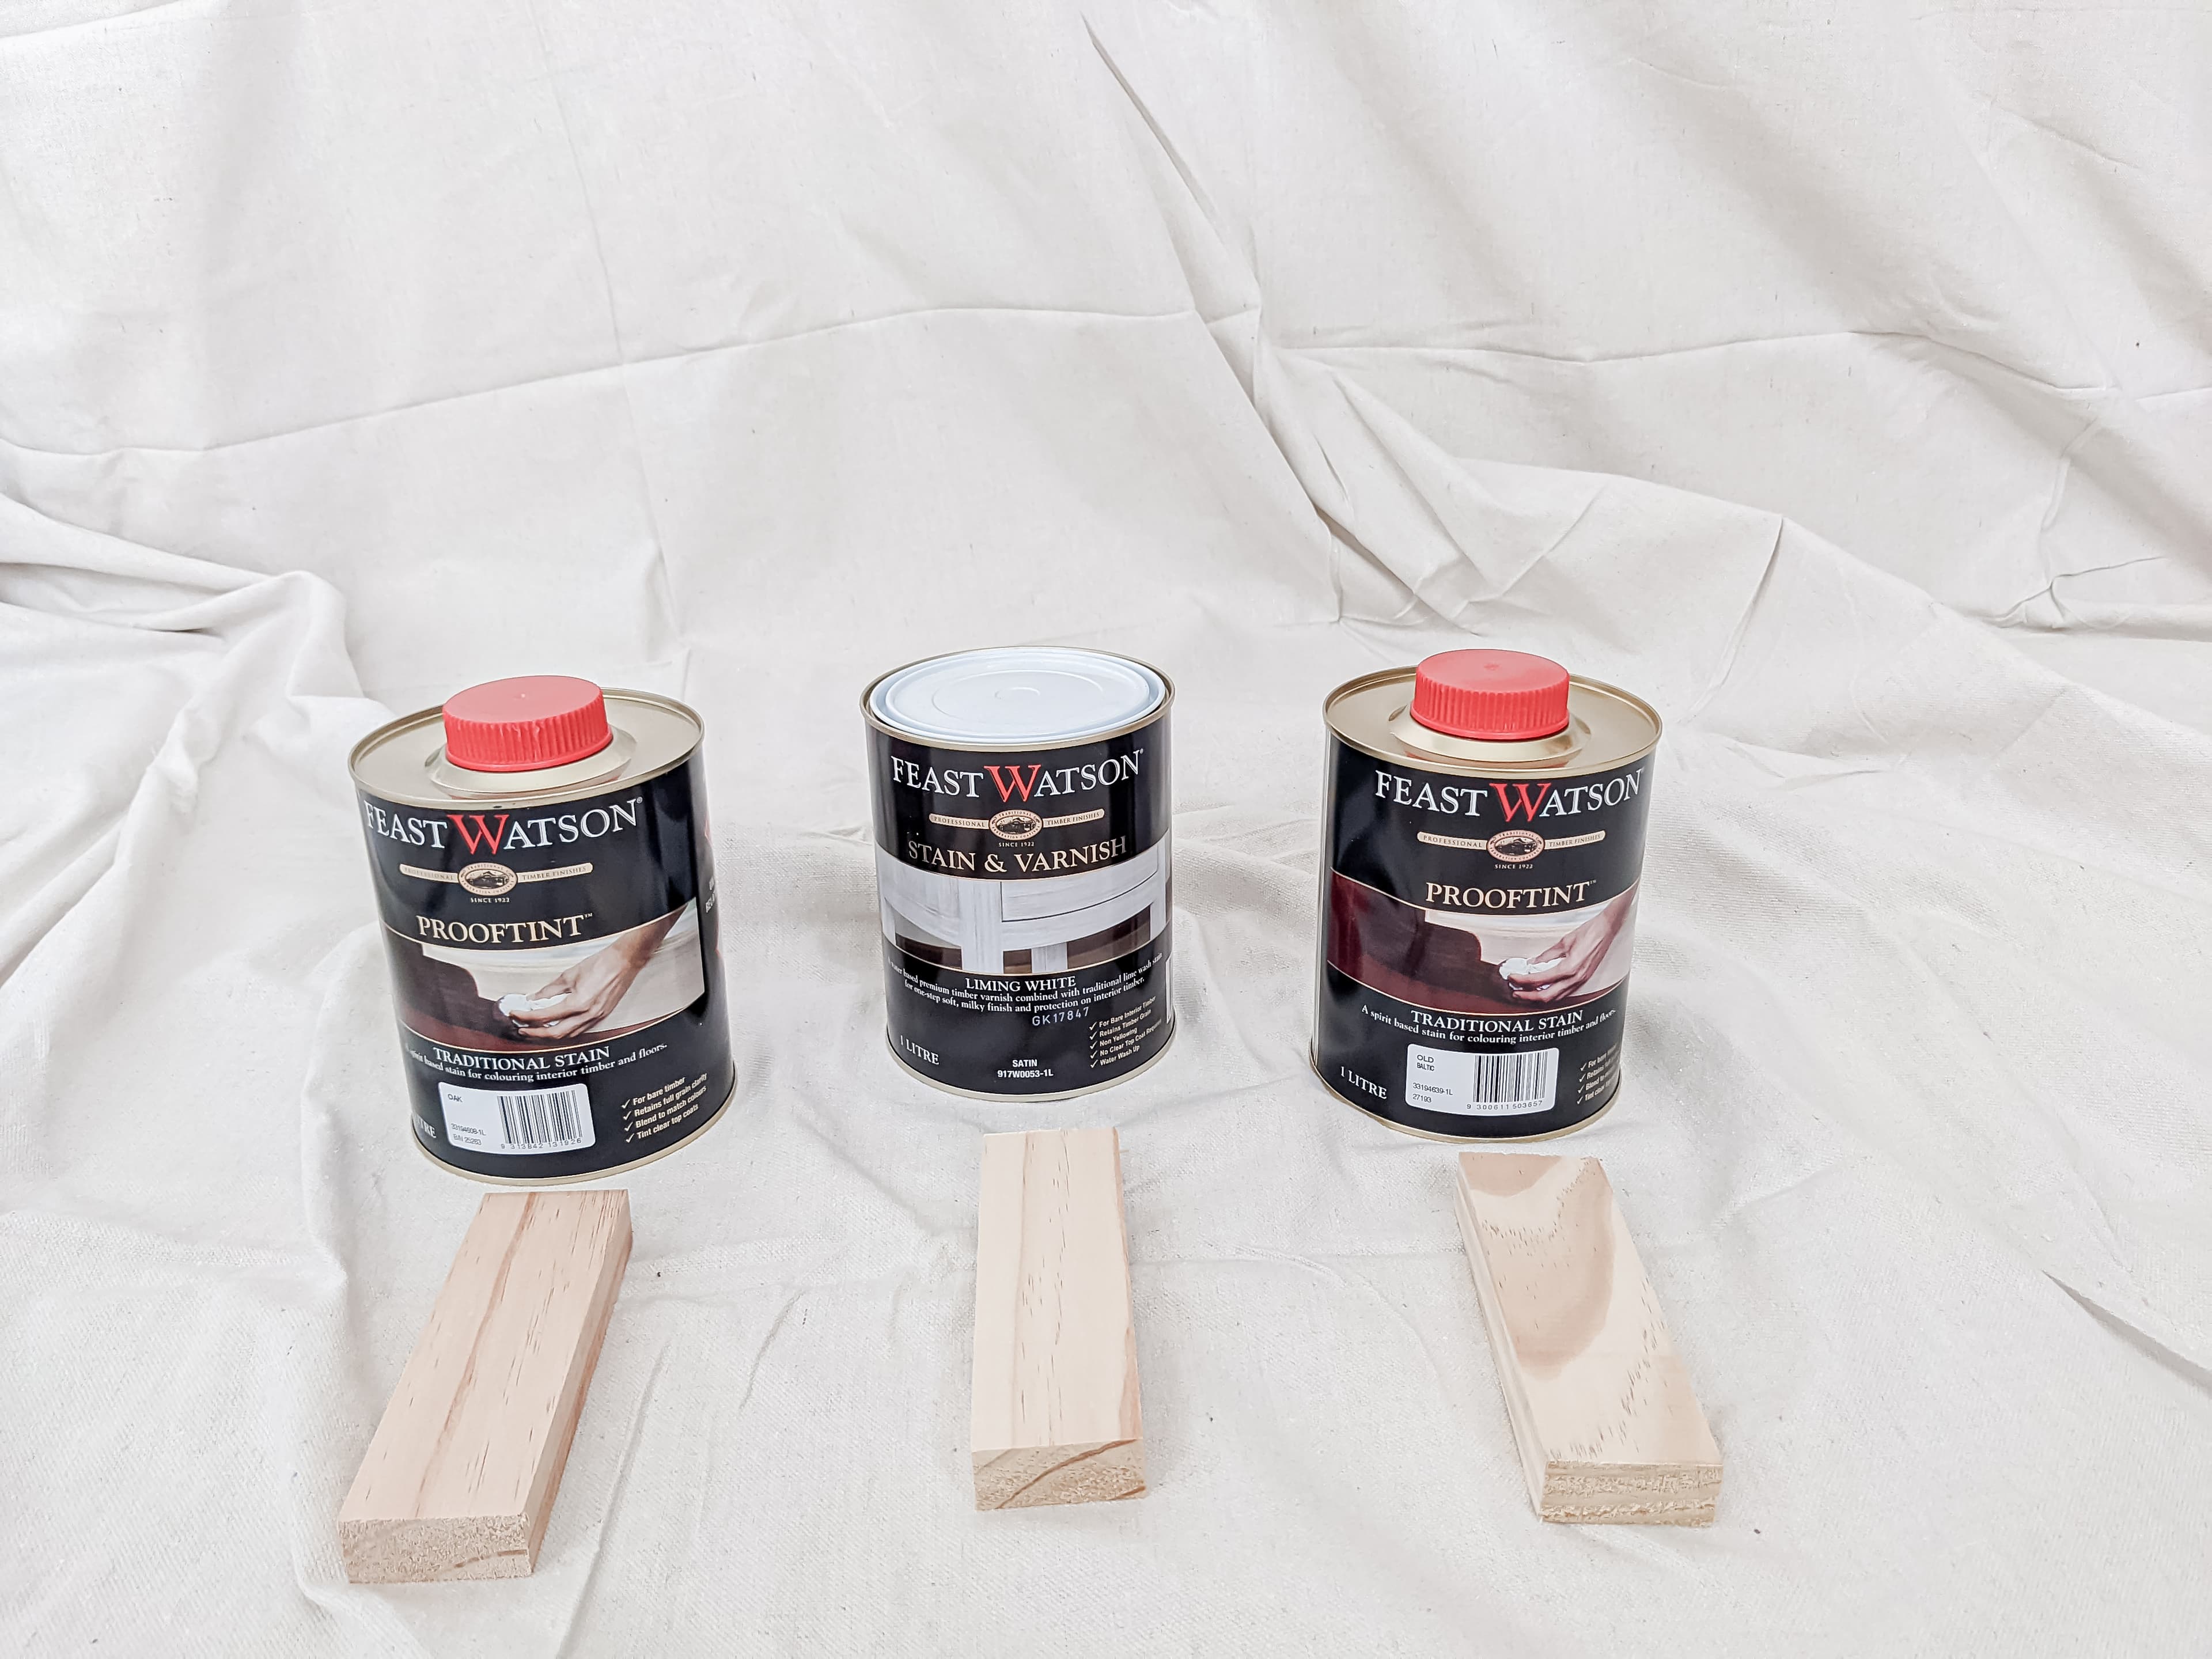
Oak
Old Baltic
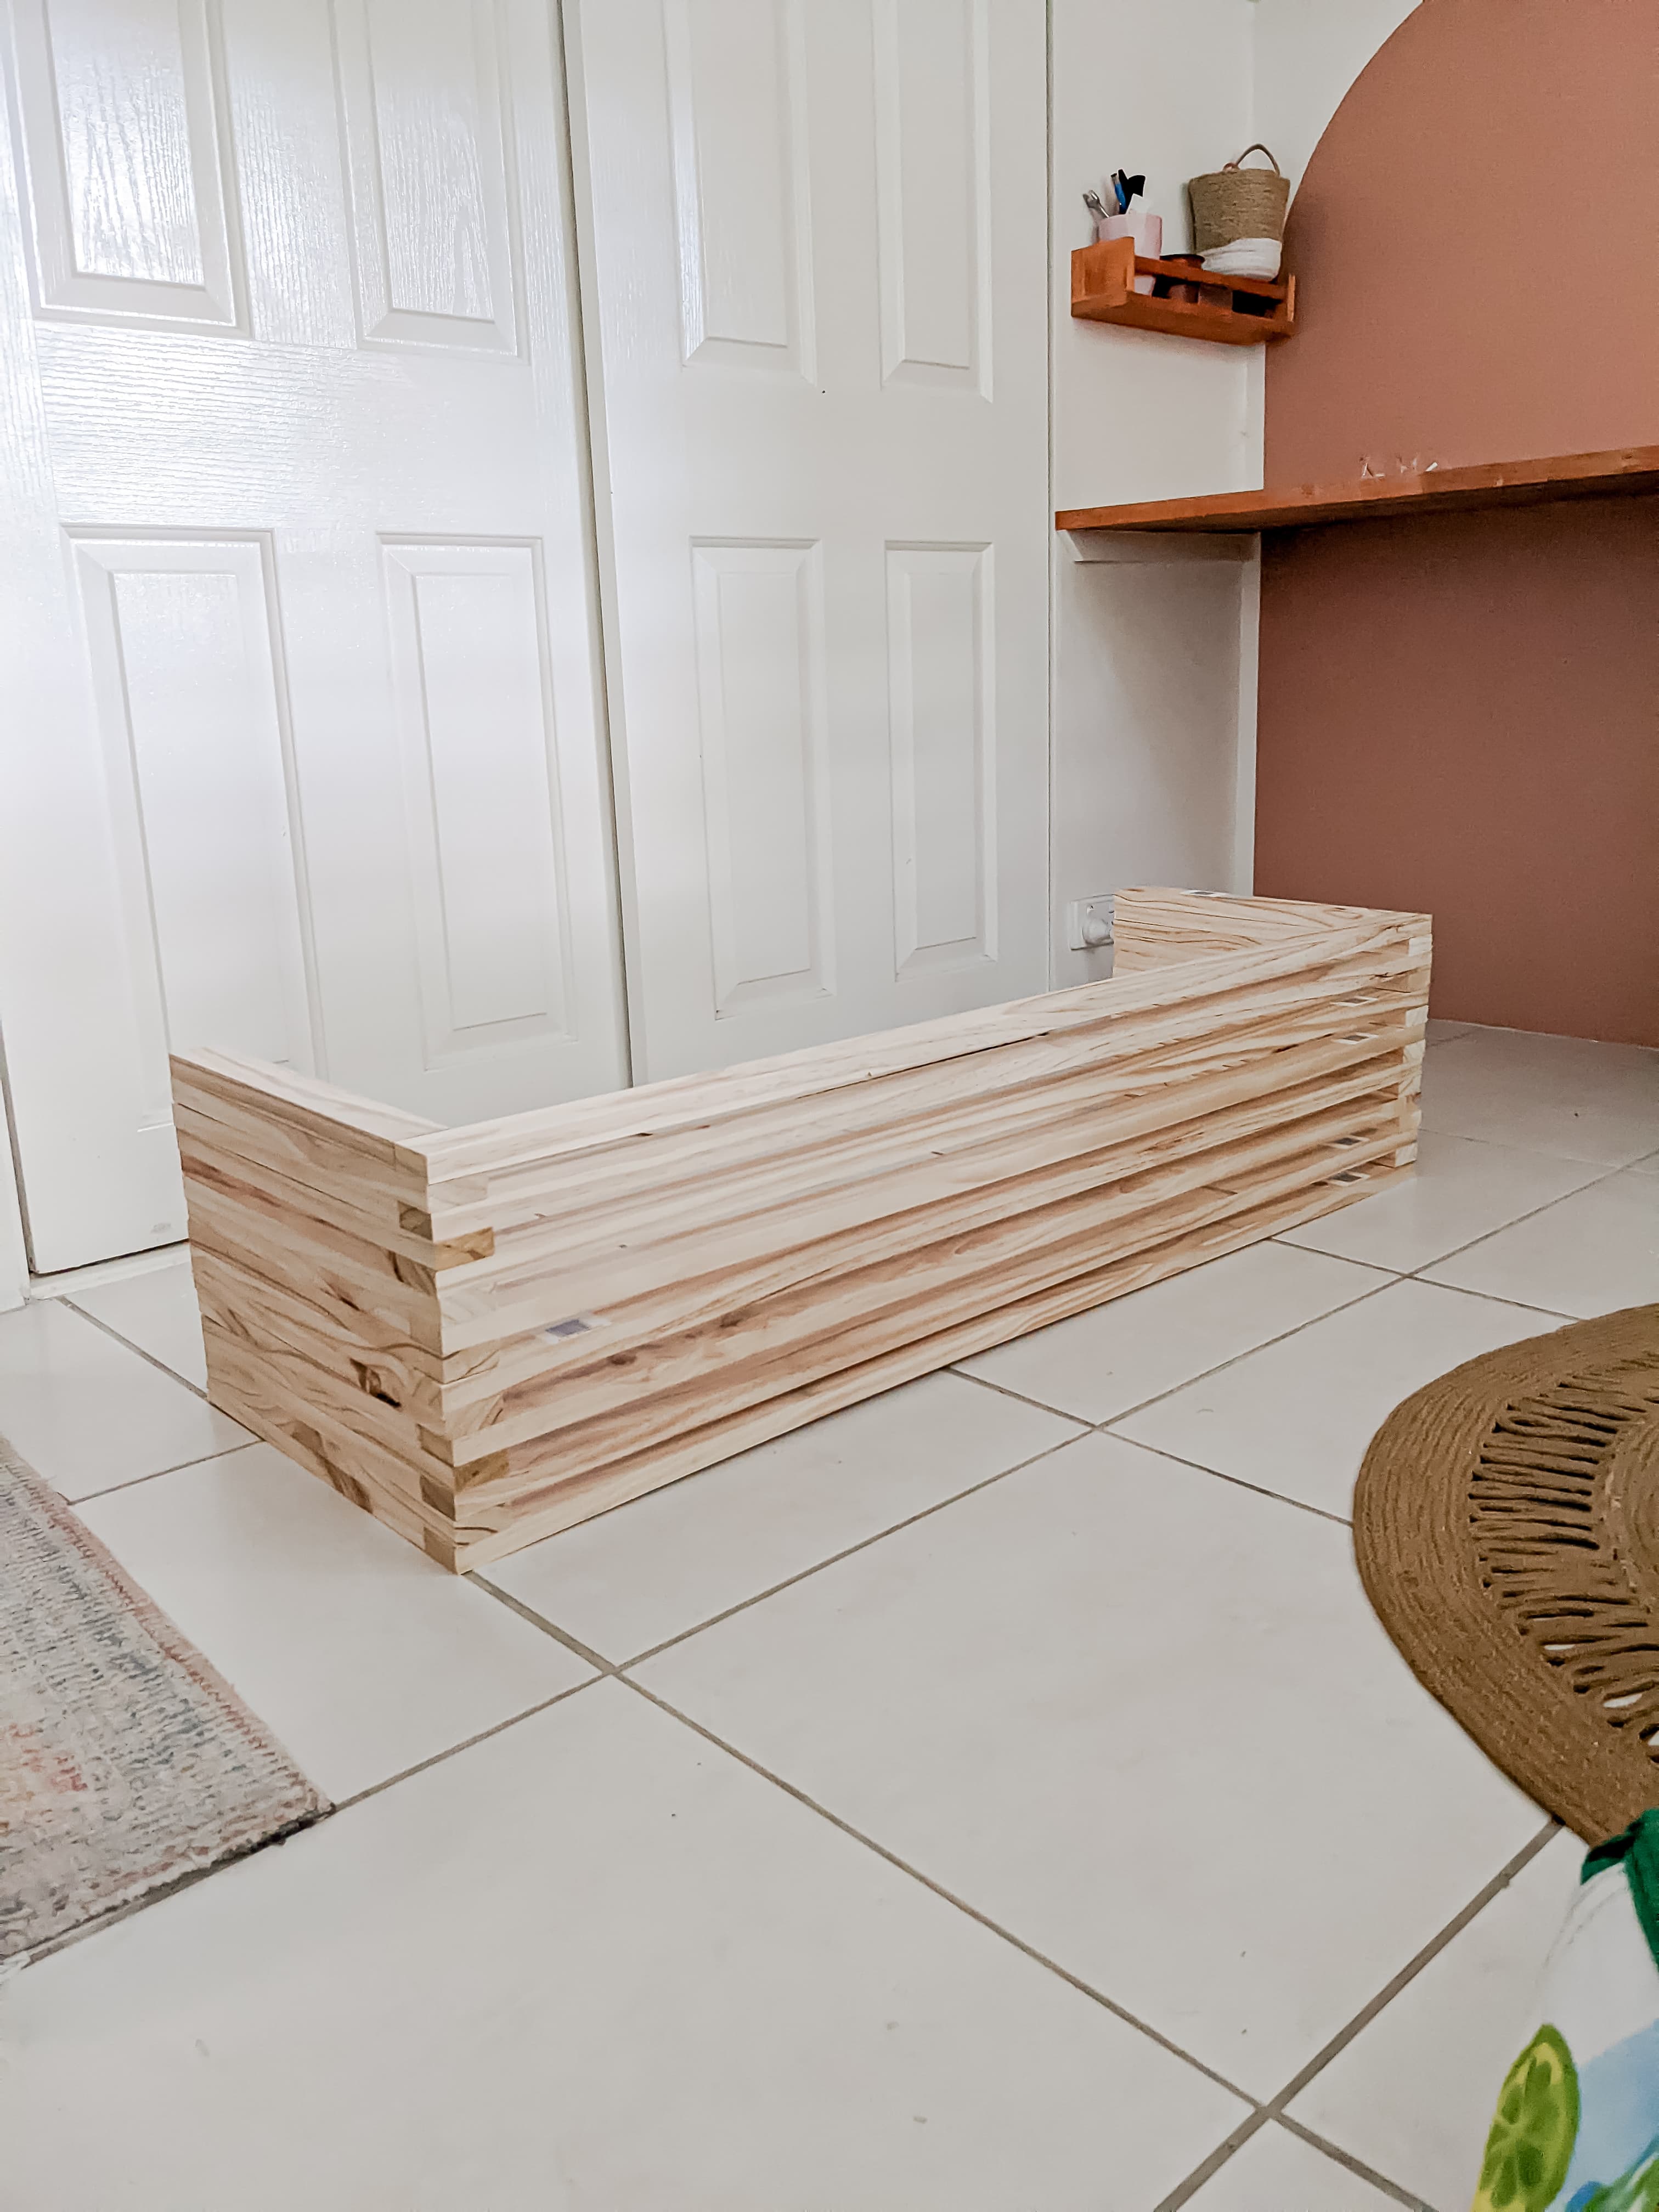
Step Two: Construction
Position the long leg plank (400mm) on top and the short leg plank (385mm) on the bottom and apply glue to both the top and leg lengths.
Add a layer of seat and short leg planks and nail down.
Repeat with a layer of long leg planks, nailing into both the seat and short leg planks.
Continue until you have used up all your planks.
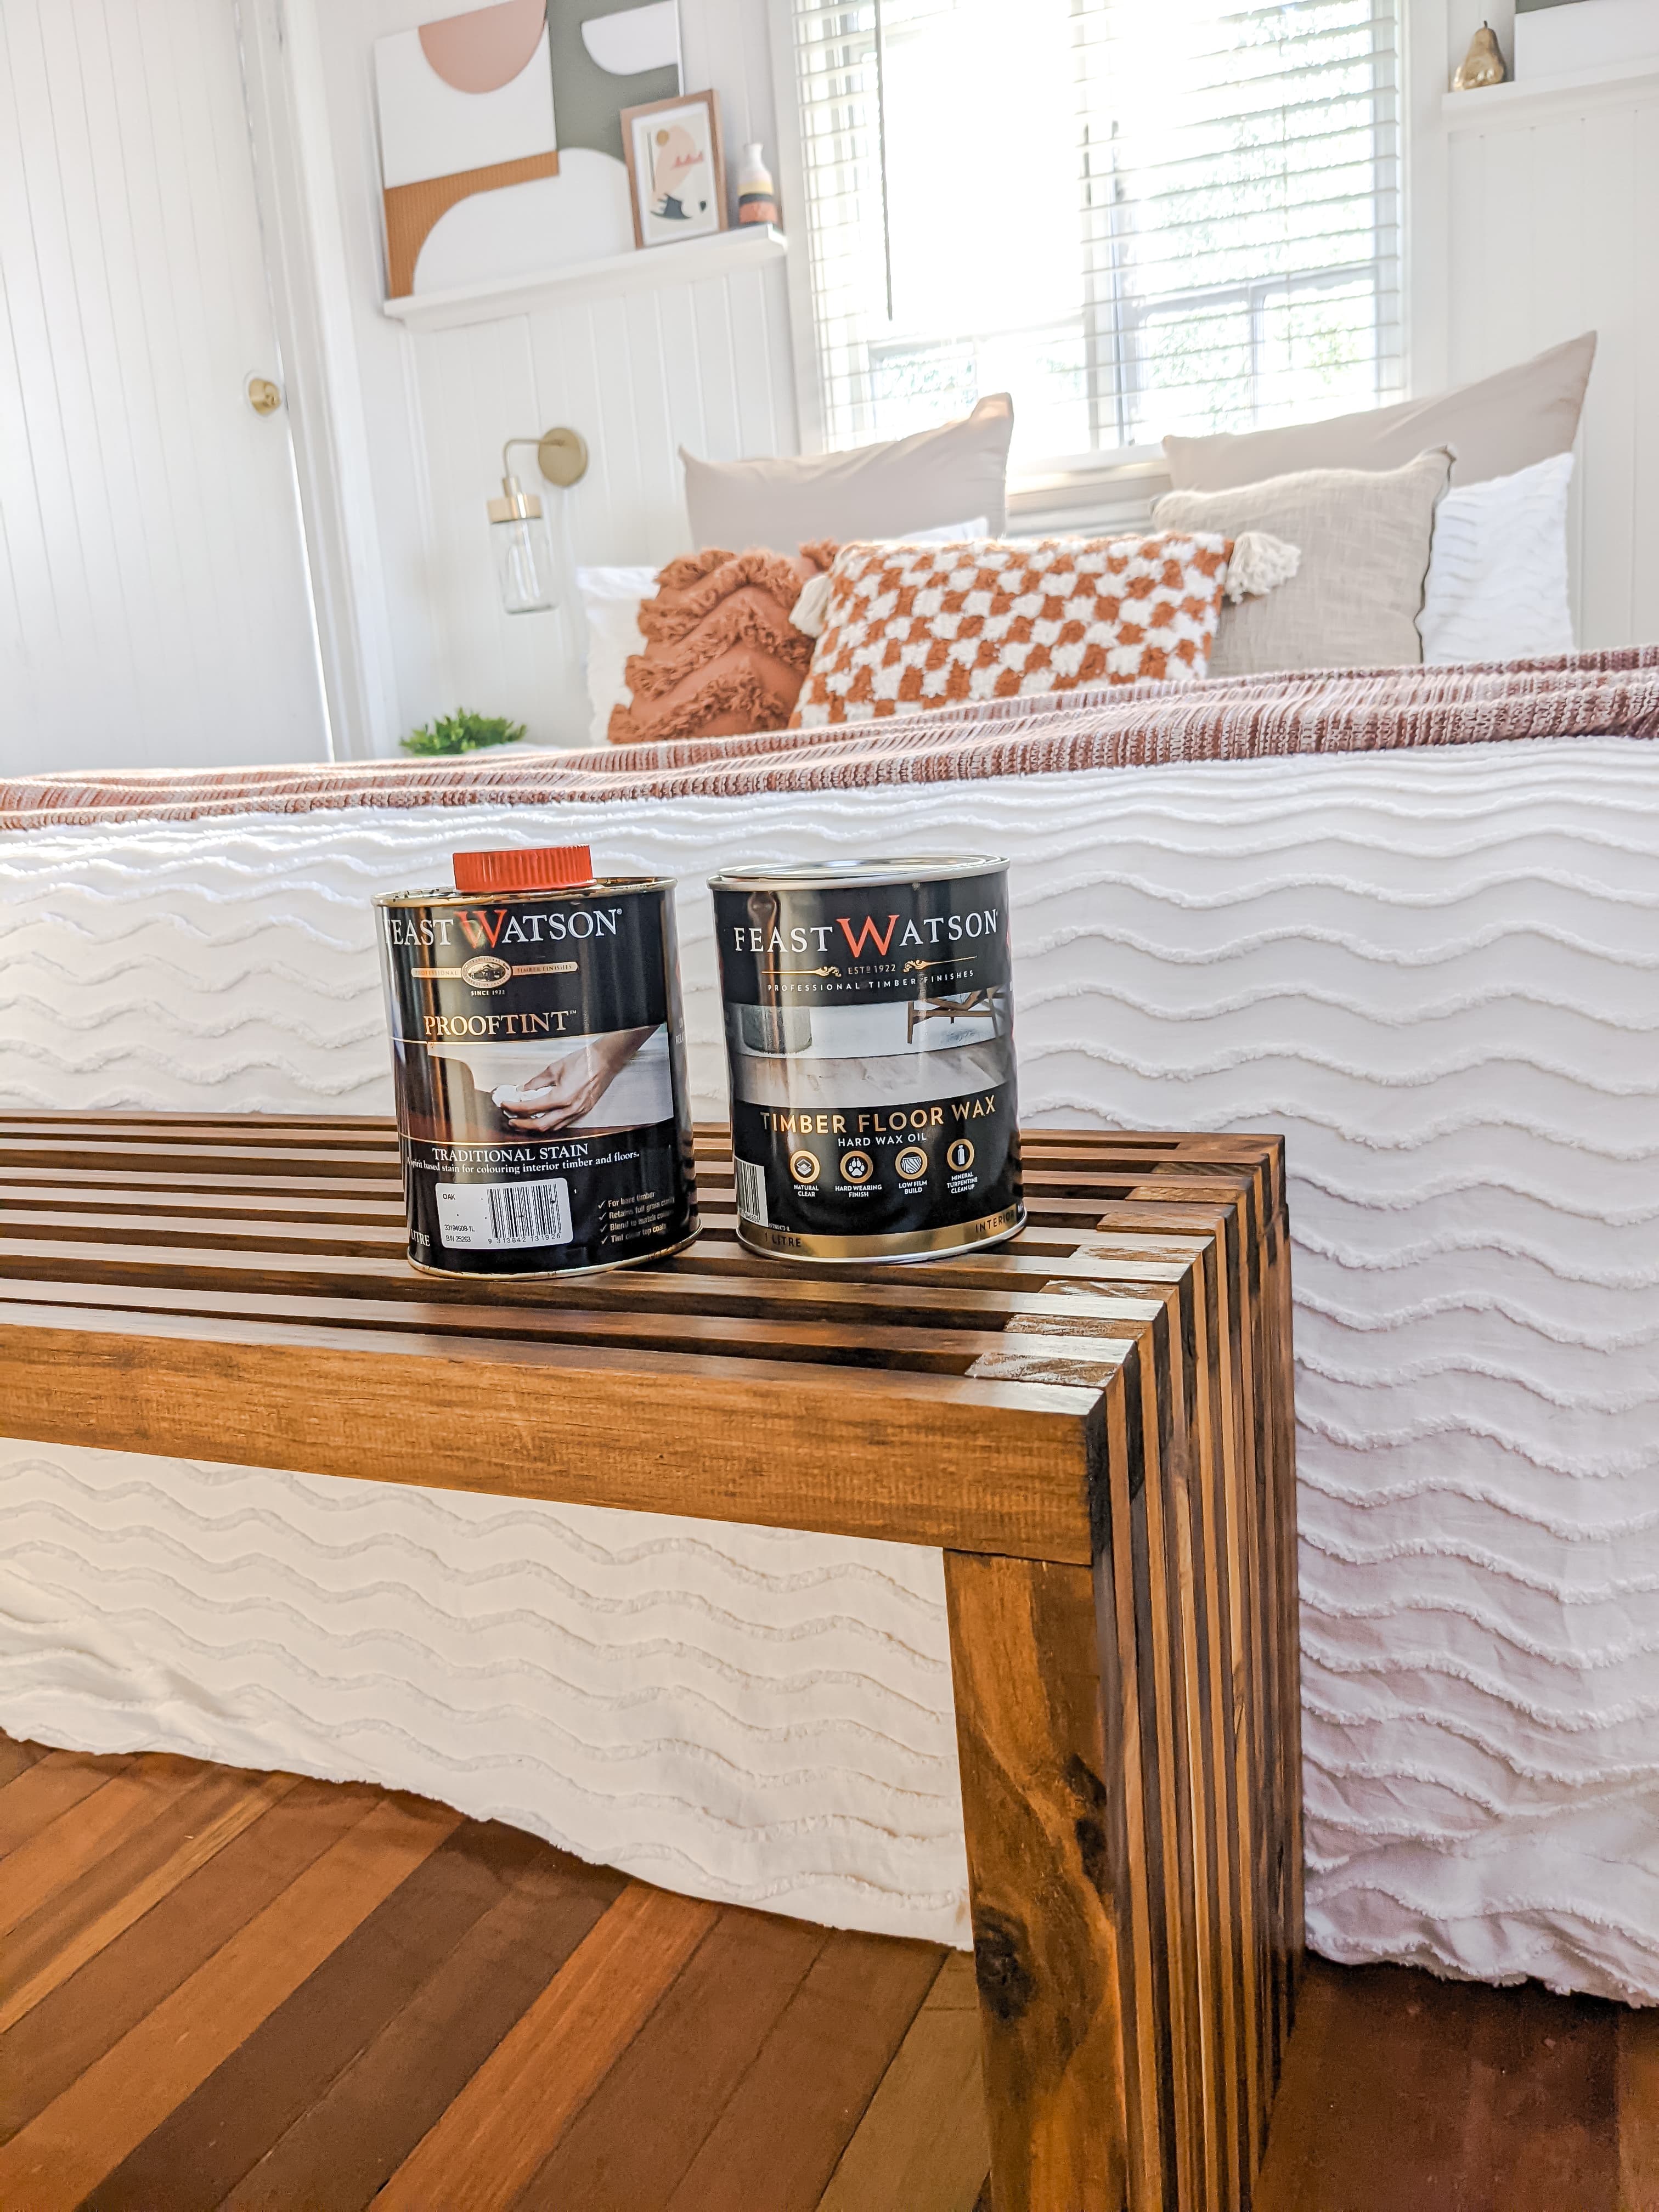
Step Three: Finish and enjoy
Apply Timber Floor Wax to seal in the Prooftint hue & protect your bench.
Related Guides
How-to repurpose with Geneva Vanderzeil
Obsessed with furniture refreshing and reviving old pieces with some TLC, Geneva took to re-loving her vintage cabinet with a simple strip, sand and stain.
How-to restore with The Design Files
Lucy isn’t your typical ‘handy’ person, but with some of our beloved timber coating and care products (and a bit of elbow grease!), she has transformed a once scuffed sideboard into a beautiful bar.